
How to deep clean vacuum cleaner, First unplug it and empty the dust container. Then, wash or replace filters, clean the brush roll, and check hoses for blockages.
Maintaining a clean vacuum cleaner is crucial for its performance and longevity. Your vacuum cleaner can start underperforming due to accumulated dust, debris, and allergens. A deep clean helps maintain strong suction, remove bad odors, and keep your vacuum working like new. Regular cleaning not only ensures optimal functionality but also extends the life of the vacuum cleaner.
This guide provides you with 8 easy processes that are straightforward and effective for how to deep clean vacuum cleaners. By taking a little time to vacuum clean give attention to each part of your vacuum, from the dust container to the filters and brush roll. You ensure that your vacuum maintenance keeps up with the household cleaning demands. So, Read this specific article for deep cleaning vacuum cleaners to keep your vacuum in top shape, helping it keep your living space dust-free and hygienic.

Credit: houseofenki.com
What You Will Need Before Deep Cleaning Your Vacuum Cleaner
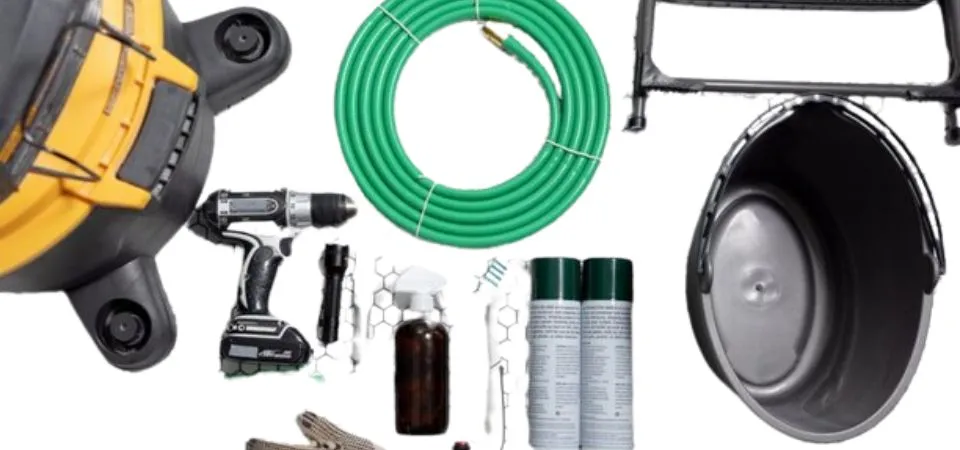
To ensure an efficient and safe cleaning process, it’s important to gather all the necessary materials beforehand.
- A soft cleaning brush
- A microfiber cloth
- Screwdriver
- Scissors
- A small container (holding any loose screws or parts)
- A trash bin for debris.
- Vacuum cleaner solution
- Musk
Before deep cleaning your vacuum cleaner make sure of the materials. Disconnect the vacuum cleaner from any power source to eliminate the risk of electric shock. An understanding of your vacuum’s manual can be beneficial, as it will provide specific instructions regarding disassembly and which parts are washable. Remember that proper preparation sets the stage for a successful cleaning task, keeping your appliance in top working order and extending its life span.
How To Deep Clean Vacuum Cleaner
Ensuring your vacuum cleaner is in top-notch condition requires regular maintenance, a process many might not be familiar with. To start, unplug the device for safety before opening it up.
- Clear a workspace to take apart the vacuum.
- Empty and remove all dirt receptacles, bags, and filters. Set filters aside to clean later.
- Use a screwdriver to detach the powerhead and all hoses, wands, brushrolls, and attachments.
- Follow your owner’s manual to fully disassemble the vacuum and access the motor, interior hoses, fans, etc.
- Use small brushes and vacuum cleaner solution to scrub inside all hoses, motors, fans, and parts. Wipe away debris with a rag.
- Rinse filters thoroughly under running water until clear. Allow to air dry fully.
- Reassemble the vacuum by reversing the steps, and securing all parts in place.
- Power on and test suction to ensure the deep clean restored strong suction power.
Regularly following these steps can increase your vacuum cleaner’s life and ensure it works efficiently for your cleaning needs.
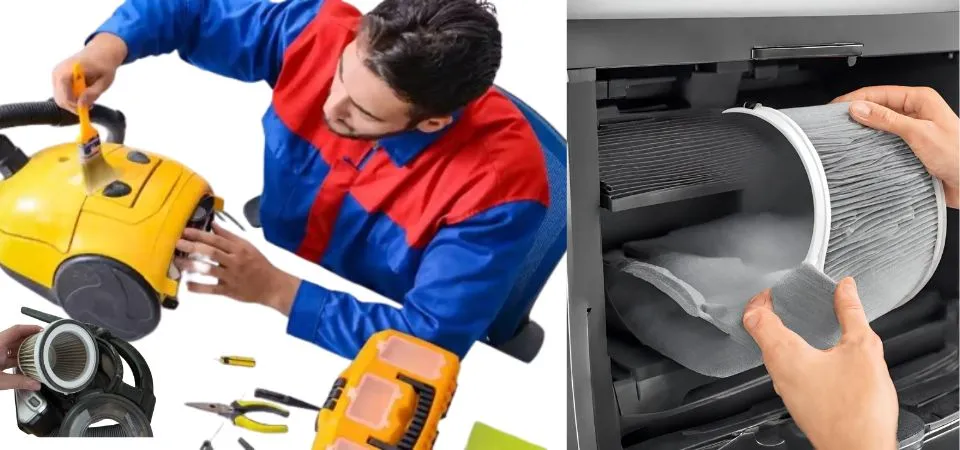
Step 1: Disassemble The Vacuum Cleaner
Cleaning your vacuum cleaner is essential for maintaining optimal performance. Begin by unplugging the device for safety. Gather any tools you may need, like a screwdriver or cleaning brush. Carefully dismantle the vacuum cleaner by removing the canister, filter, and any detachable parts according to the manufacturer’s instructions.
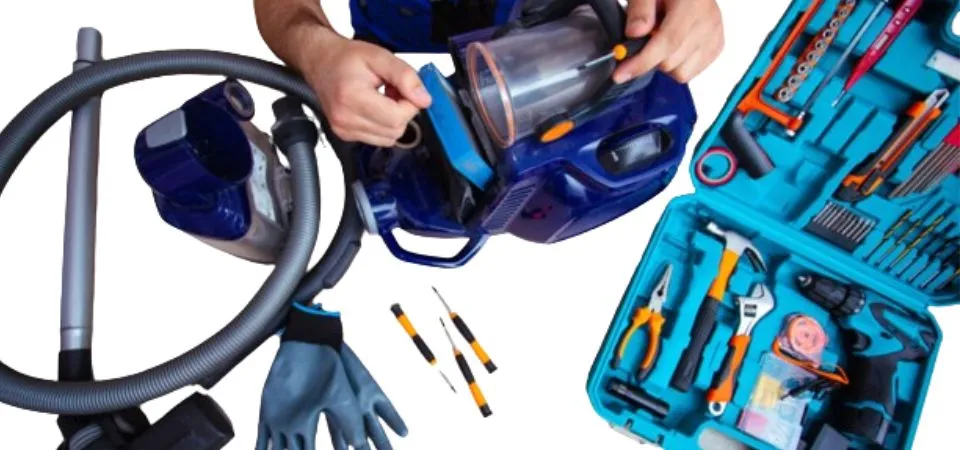
Remember that some components may be fragile, so handle them with caution. Ensure that you keep track of screws and small pieces to facilitate easy reassembly later. Clearing debris from the canister and brushes can prevent future blockages and potential damage, making this step crucial in the cleaning process.
Step 2: Empty The Vacuum Cleaner
Begin by powering off your appliance to ensure safety before proceeding to detach the dust container or bag from the vacuum cleaner. Gently remove the collected debris; for bagless models, release the contents into a trash bin. If your device uses bags, dispose of the full bag and replace it with a fresh one.
It’s essential to handle the waste carefully to prevent a mess or the dispersal of dust back into your environment. Cleaning this component not only boosts the efficacy of your vacuum cleaner but also contributes to better indoor air quality by minimizing the recirculation of dust particles.
Remember to check the manufacturer’s instructions for specific guidance tailored to your model.
Step 3: Remove The Filters From The Vacuum Cleaner
To ensure your vacuum performs at its best, removing and cleaning the filters is a critical step. Initially, consult your user’s manual to locate the filters since different models house them in various sections. Once identified, extract them gently to avoid causing damage.
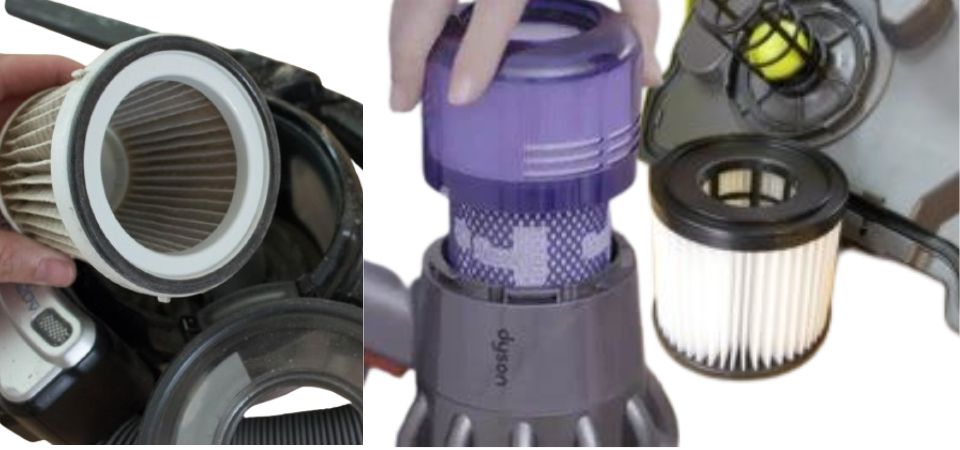
Remember, some filters are reusable and can be wiped or rinsed, while others require replacements after a certain period. It is important to discern which type you have. Washable filters should be cleaned with cool water and thoroughly air-dried to prevent mould growth.
Undertaking this maintenance not only extends the lifespan of your vacuum but also significantly enhances indoor air quality by preventing accumulated debris from recirculating.
Step 4: Wash The Filters
Maintaining your vacuum cleaner’s performance hinges on clean filters, so taking the time to wash them correctly is crucial. Begin by removing the filters from your vacuum cleaner—most models will have a standard process for this. Tap the filter gently to dislodge any loose dust before rinsing it under cold water.
Ensure a thorough cleanse by using your fingers to agitate the dirt but take care not to damage the filter material. Once the water runs clear, shake off the excess and leave the filter to air dry completely—this is vital as a damp filter can lead to mold and hamper the vacuum’s effectiveness.
Remember, some filters are designed for regular washing, while others must be replaced after a certain amount of time to maintain efficiency and hygiene. Always consult your vacuum’s manual to verify the correct cleaning method for your specific filter type.
Step 5: Clean The Dustbin
Emptying the dustbin of your vacuum cleaner should be done with the utmost attention, ensuring that no debris remains that could hinder its performance. Begin by detaching the bin carefully from the main vacuum body. Once removed, it’s advisable to empty the contents into a trash bag to prevent any spillage.
After discarding the dirt, a gentle yet thorough wipe down of the inside using a damp cloth will help remove any lingering dust particles. For persistent or stuck-on grime, a soft-bristled brush can be used to loosen the debris without damaging the bin’s surface.
It’s essential to let the dustbin dry completely before reattaching it to the vacuum, as moisture can lead to mold growth or unpleasant odors. Regular cleaning not only promotes better vacuum functionality but also extends the lifespan of the equipment.
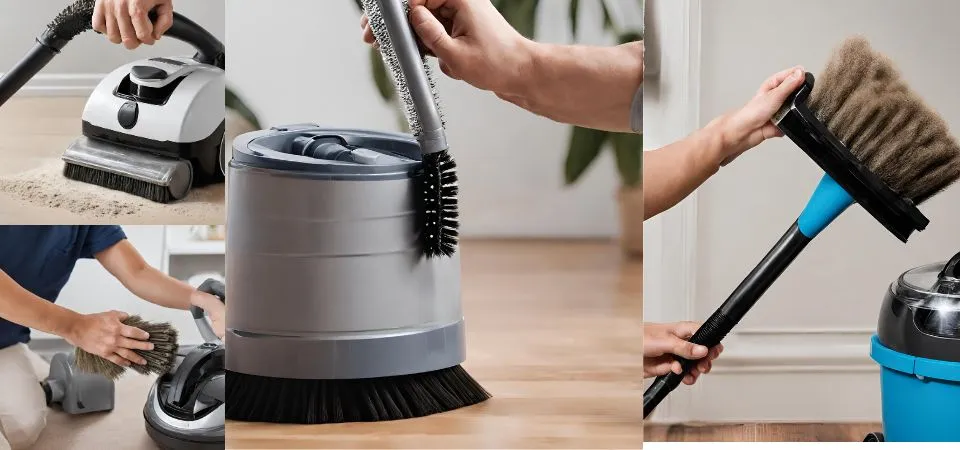
Step 6: Clean The Vacuum Cleaner Head, Hose, And Other Attachments
Maintaining a vacuum cleaner ensures it performs at its best. For the sixth step, begin by wiping down the head of the cleaner with a dry cloth to remove any lingering dust or debris. Then, take care to detach the hose and inspect it for blockages, using a long, slender tool to dislodge any stuck particles if necessary.
Next, turn your attention to the attachments, which often harbour hidden dust; rinse these with warm water and a mild detergent, making sure they are completely dry before reassembling your device. Remember, a bit of regular maintenance can significantly extend the life of your vacuum cleaner, keeping your home clean and your equipment working efficiently.
Always consult the manufacturer’s guidelines when in doubt, as some parts may require special care to prevent damage.
Step 7: Reassemble The Vacuum Cleaner
After all components of your vacuum cleaner have been meticulously cleaned and dried, the reassembly process is crucial to ensure the optimal function of your device. Begin by placing the filters back into their designated compartments, taking care to fit them snugly without forcing them into place.

Next, reattach the dustbin or canister, clicking it securely onto the main body of the unit. Reconnect hoses and other attachments with a firm push or twist, listening for the satisfying click that indicates a proper seal. Double-check that every part is properly affixed to prevent any loss of suction or potential leaks.
Once you’ve confirmed that everything is in its right place, your vacuum cleaner is ready to tackle dirt and debris once more, operating with an efficiency that is akin to that of a newly purchased model.
Step 8: Test The Vacuum Cleaner
After reassembling your vacuum cleaner, it’s crucial to ensure everything is functioning correctly. Give it a trial run on a small, debris-free area of flooring. Listen for unusual noises that could indicate an issue, such as a clogged hose or a motor problem.
Check that the suction power is consistent with the vacuum’s performance before the cleaning process. If the vacuum isn’t operating as expected, turn it off and unplug it before investigating the cause. Double-check each component, including the filter, hose, and attachments, to confirm they’re securely fastened and obstruction-free.
Once satisfied with the inspection, you can confidently resume using the vacuum in other areas of your home, secure in the knowledge that it’s clean and fully operational.
How To Clean Your Vacuum Cleaner Filters
Maintaining a pristine vacuum cleaner is crucial for its efficiency and longevity. Filters are particularly susceptible to dust and debris accumulation, which can impede performance. To tackle this, first ensure the vacuum is unplugged, preventing any electrical hazards. Gently remove the filter according to the manufacturer’s instructions; typically, this involves opening the filter compartment.
Use a brush to dislodge any loose particles. If the filter is washable, rinse it under lukewarm running water until the water runs clear. For non-washable filters, a good shake or tap should suffice to remove the dirt. After cleansing, the filter must be completely dry before reinstalling to prevent mold growth.
Regular maintenance of filters not only enhances cleaning efficiency but also extends the vacuum’s service life.
Credit: nwmaids.com
Frequently Asked Questions Of How To Clean Vacuum Cleaner Step-by-step
How Do I Deep Clean My Vacuum Cleaner?
Unplug your vacuum cleaner. Empty and clean the dustbin or replace the bag. Wash or replace filters as needed. Clear the brush roll of tangled hair and debris. Wipe down the exterior with a damp cloth.
What Is The Process Of Vacuum Cleaning?
Vacuum cleaning involves powering on a vacuum cleaner and passing its nozzle over surfaces. Dirt and debris are sucked into a bag or canister for disposal. Regular emptying and filter maintenance ensures optimal performance.
How Do You Use A Vacuum Step By Step?
Plug in the vacuum cleaner. Turn it on using the power switch. Guide it back and forth over the area to clean. Use attachments for corners and upholstery as needed. Turn off and unplug the vacuum when finished.
How Do You Make A Vacuum Cleaner Step By Step?
To build a vacuum cleaner, gather a motor, filter, fan, electrical components, and a dust container. Assemble the motor and fan to create suction. Connect electrical parts for power. Attach the filter before the dust container to trap debris. Encase all in durable housing for the final product.
Conclusion
By following the 8 steps you can learn how to deep clean your vacuum, you can keep it working well. Do things like washing the filters, cleaning the brushes, and emptying the dirt regularly. This helps the vacuum suck air powerfully. After putting it back together, check that everything is working right. Make a schedule for regular vacuum cleaning. Empty it after using. Wash parts monthly. Deep clean every 6 months. Replace old filters and brushes when needed. Proper cleaning prevents dirt buildup and clogs. Your vacuum will work great for many years!

